This place is amazing. Got our manual in a few hours. Print quality is excellent. Even the manufacturer didn't have this manual. The price was excellent. How many more stars can I give them? More than satisfied.
I'm so glad I was able to find a site to download my missing manuals. Very reasonable prices and they kept me informed about the process and I had my manual within less than a day. The only thing I wish was an option is a 100% English version with no spanish or anything. But overall great site.
The manual is complete with excellent quality! One suggestion, show number of pages and weather it is multi-lingual. The AD 600 Manuel is about 76 pages and over half is non English. This results in a larger print job than usually needed. Having this information, one could select the desired pages for printing.
I've been looking for a copy of the original user/owner manual. Just what the doctor ordered, thank you.
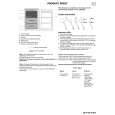
Text excerpt from page 17 (click to view)
Rack Mounting
The unit can be installed in a 19-inch standard rack using the rack-mount adaptors supplied with the unit. We recommend using the slide rails and brackets specified below for the installation. CC3001-99-0191 slide rails and B-308 brackets are made by CHASSIS TRAK. For further details, consult your dealer.
1
Remove the four feet from the unit�s bottom panel. Take care to avoid exposing the unit to vibration or impact.
5
Remove the stoppers of the inner members, and install the unit in the rack. After installation, check that the unit moves smoothly. Keep the temperature in the rack between 5°C (41°F) and 40°C (104°F) Use the rack-mount angular brackets supplied with the unit.
2
Mount the slide rail inner members onto the unit.
The length of the mounting screws is limited. Use the screws (M4a10) provided with the slide rails. If one or more mounting screws are lost or misplaced, use screws less than 10 mm long. Be sure to fully tighten the inner members in the four places on the left and right.
3
Attach the outer members of the slide rails and the brackets to the rack. � Note Check that the height is the same on the left and the right.
4
Attach the rack-mount adaptors supplied with the unit to the unit.
Use the screws provided with the rack-mount adaptors as the mounting screws. Be sure to fully tighten the rack-mount adaptors in the two places on the left and the right sides.