I was very glad recieving the service manal from You. Additionaly very fast. Extremaly nice servicing. Thanks very mach! Now my GX-220 working better, than it was made. Alexander from Moscow, Russia/
Sweet! I won the item on eBay and couldn't adjust the geometry or even keep a steady picure. This guide has the full schematics (not available anywhere else as far as I could tell), and was a bargain for the wealth of knowledge it contains. I hooked it up to my testing equipment, tweaked a few potentiometers and got it playing videogames in no time. Thanks!
Great Manual! It contains all the wiring schematics and mechanical exploded views that are essential for service and repair. I was surprised I even found this for such an old machine. Only wish I knew of this site many years ago.
Great manual very clear copied. You are making an incredible job. I appreciate a lot the rapidity and your efficiency. Thanks a lot
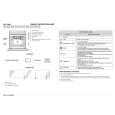
Text excerpt from page 17 (click to view)
Note:
Components and test points within doted areas are located on trace side.
B+ voltage check
1. Set the BRIGHT and PICTURE to minimum by using the PICTURE menu. 2. Connect the DVM between C825 (+ side) or TPD14 and cold ground. 3. Confirm that B+ voltage is 131.0V ± 2.0V. This voltage supplies B+ to the horizontal output and flyback circuits.
Source voltage chart 120V AC line input. Set the BRIGHT and the PICTURE to minimum by using the PICTURE menu. Use cold or hot ground for the (-) lead of the DVM as needed.